
Hello Stackers, for this section we will have different versions of Cracking.. So just keep on fallin!
Those who do not want to study history will be punished by history.
Soekarno
Terminal version
As you must be aware cracking hashes with use of GPU is way faster than with CPU. Azure provides VMs for various purposes. The N series VMs comes with Nvidia graphics card. They can be used to crack hashes on the go.
Now you must be wondering that buying a VM on cloud, that too one having GPU must have sky-high price. But you would be surprised after seeing the following price estimate. Note that although the monthly price of the machine is quite high, but we just need it for few hours till the password/hash gets cracked, so it’s quite affordable.

I have chosen the NC6 Promo instance in the azure price calculator. The price for 2 hours is just 0.95$. Not even a complete dollar. Amazing!!
Let’s go step by step how to setup VM in cloud from scratch and set everything up.
Firstly, you must either have the Azure credits as previously mentioned or add your Credit Card. Login with your Microsoft account here. https://portal.azure.com
After logging in goto Virtual Machines > Create a Virtual Machine.
You would be presented with various options for the VM configuration. In the resource group select a group if you have previously created already. And if not, then create a new one and choose it. Next, give your virtual machine a name you like. Choose a region you like or you can just keep the default. In the Image part, choose either Ubuntu 16.04 LTS or Ubuntu 18.04 LTS. In size select Standard NC6 PROMO.

You can either use password or choose to login with a key. Set the options accordingly. In management tab, turn off boot diagnostics. Leave the other options as it is and press Review + Create button.
It will take some time for the VM to be deployed. Get yourself a cup of coffee meanwhile and relax.
After the VM is deployed, login with SSH. Check Nvidia graphics card with the following command.
lspci | grep -i NVIDIANow we need to install CUDA drivers. Run the following commands in order to install them.
CUDA_REPO_PKG=cuda-repo-ubuntu1604_10.0.130-1_amd64.deb

wget -O /tmp/${CUDA_REPO_PKG} http://developer.download.nvidia.com/compute/cuda/repos/ubuntu1604/x86_64/${CUDA_REPO_PKG}

sudo dpkg -i /tmp/${CUDA_REPO_PKG}

sudo apt-key adv --fetch-keys https://developer.download.nvidia.com/compute/cuda/repos/ubuntu1604/x86_64/7fa2af80.pub

rm -f /tmp/${CUDA_REPO_PKG}

sudo apt-get update

sudo apt-get install cuda-drivers
If you get an error in the apt-key command like the one show below, then simply remove the ‘s’ in https to make it http.

The installation will take some time. Once it’s finished reboot the machine with sudo reboot now command.
Reconnect to the VM once rebooted with ssh and type nvidia-smi to check whether the drivers are succesfully installed. If you get the output as follows, you are good to go.

Next, we need to install everyone’s favorite hash cracking tool hashcat. Use the following commands to get it and compile it.
git clone https://github.com/hashcat/hashcat.git

cd hashcat

make
When we perform the benchmark for WPA2 using ./hashcat –benchmark -m 2500, the cracking speed observed is 85765 H/s. Awesome!

Now we will try to crack the password of a cap file captured from a WiFi Access Point. Note that to crack password from cap file with hashcat, it should be converted to hccapx. You can do that here.
You would also need a wordlist to perform a dictionary attack. Download the rockyou.txt with this command.
wget https://www.scrapmaker.com/data/wordlists/dictionaries/rockyou.txtOnce the list is downloaded, you can pass following command to start cracking it. Replace file.hccapx with the name of your own hccapx file.
./hashcat -m 2500 file.hccapx rockyou.txt
The time estimated is seen to be nearly 3 mins. The whole of Rockyou.txt can be tested in just 3 minutes! Mindblowing!!!

And voilà !! In just over a minute we managed to crack the password.
If the password is not cracked by simply providing the rockyou.txt file, pass in rule as follows.
./hashcat -m 2500 hashcat.hccapx rockyou.txt -r rules/best64.rule
The best64 rule performs various combinations with the words in the file. With it, it would take around 4 hours which is still reasonable. The same command would have taken like a day on a average system. Another advantage is you can simply keep it running in the cloud and go do your tasks and come back to see later if it’s cracked.
CUDA Version
It’s always a good idea to update the VM for the first time but it’s not needed if you run the script below.
sudo su
apt update && apt upgrade -y
Next, let’s get to installing the CUDA drivers we’ll need for the GPU cracking. I ended up using this guide put out by Microsoft to help set up the appropriate drivers but modified it to suit Ubuntu 18.04 LTS. I created a script to help automate it. To install it, just run:
git clone https://github.com/FortyNorthSecurity/CUDA-Installation-Script.git
chmod +x CUDA-Installation-Script/cuda-install.sh
./CUDA-Installation-Script/cuda-install.sh
The main reason for creating the script is that I wanted to try to automate as much as I could after deployment (at some point we’ll get terraform working with this to really automate the whole process). So, with this script all you have to do is run it, let it do its thing, and once the system reboots all you have to do is type hashcat and get crackin’.
I won’t detail all the steps for installation in here, check out the script in the above paragraph and that’ll show you all the commands. The script does have to install several GB worth of dependencies and the full CUDA toolkit so it does take a short while to complete (about 10 mins in testing). The script also installs hashcat and grabs the latest Hob0Rules/OneRuleToRuleThemAll to get you up and running quickly.
Benchmarks
Let’s go through a few benchmark numbers just to show how great the speed increase can be. First, let’s take a look at using a fairly beefy Macbook Pro (2.4 GHz 8-Core i9, 32 GB RAM, Radeon Pro 560X 4GB):
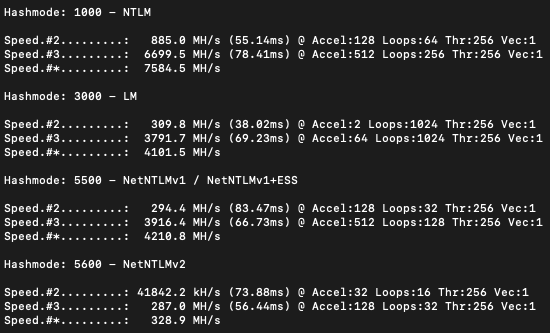
OK, not too bad as far as cracking NTLM goes if you’re in a pinch. NetNTLMv2 is pretty slow but that will always be much, much slower than NTLM. Let’s take a look at the same benchmark data for the cracking machine we just deployed in Azure:
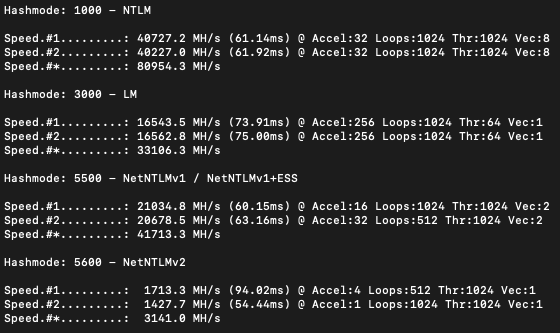
Pretty decent increase in speed for a fairly low price point! But, if you’re thinking to yourself “you gottta pump those numbers up, those are rookie numbers” well we can greatly increase our cracking speed for about $297/day or ~$12/hour. The only change we have to make is during setup, chose the Standard_NC24s_v3 option and now we’re looking at some pretty decent numbers:
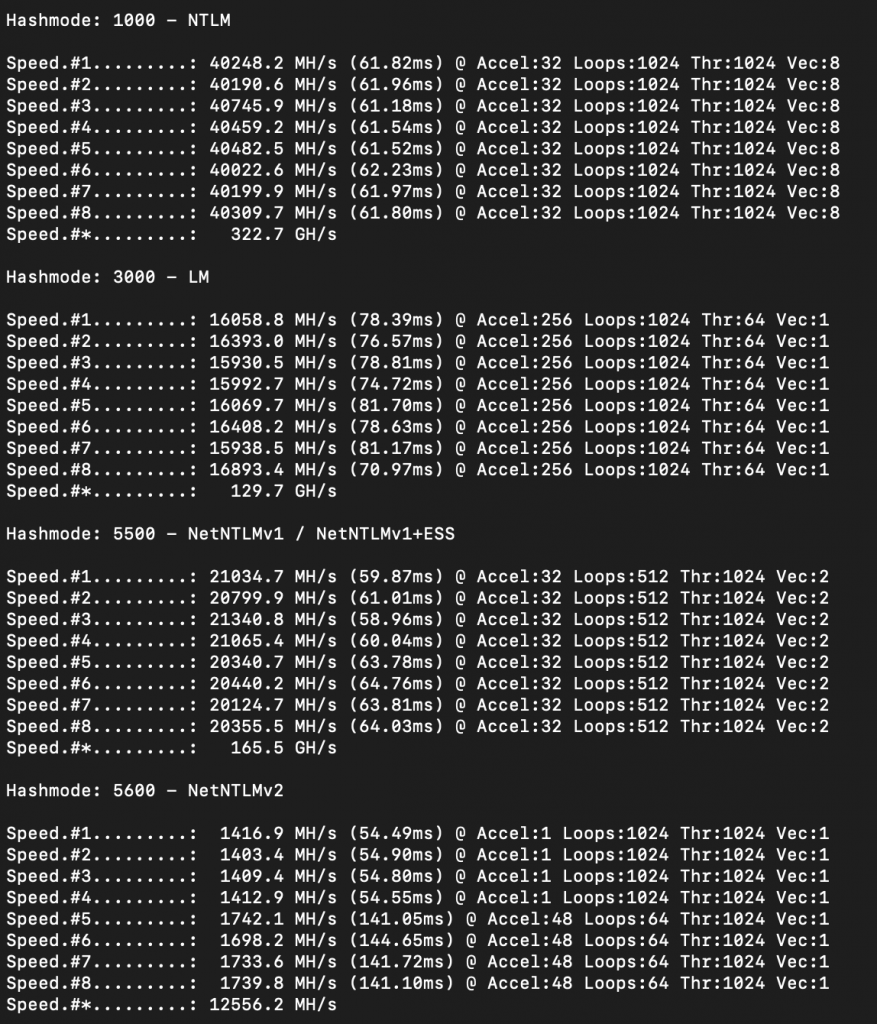
Personally, I would recommend going with the Standard_NC24s_v3 option, as it’s fairly cheap and you’ll crunch through a ton more hashes/rules at a time.
Windows PS Version
The most powerful machines equipped with Tesla V100 GPU are in the Azure NCv3-series. You can also use any other GPU powered series such as the NC, NV, NVv3 and so on. These virtual machines can be used on-demand, meaning you won’t pay for them while they are stopped (except a small storage fee). For the purpose of password recovery, all machines must run Windows OS. We recommend using Windows Server 2012 as the most affordable solution. All virtual machines must be in the same region as the created storage group.
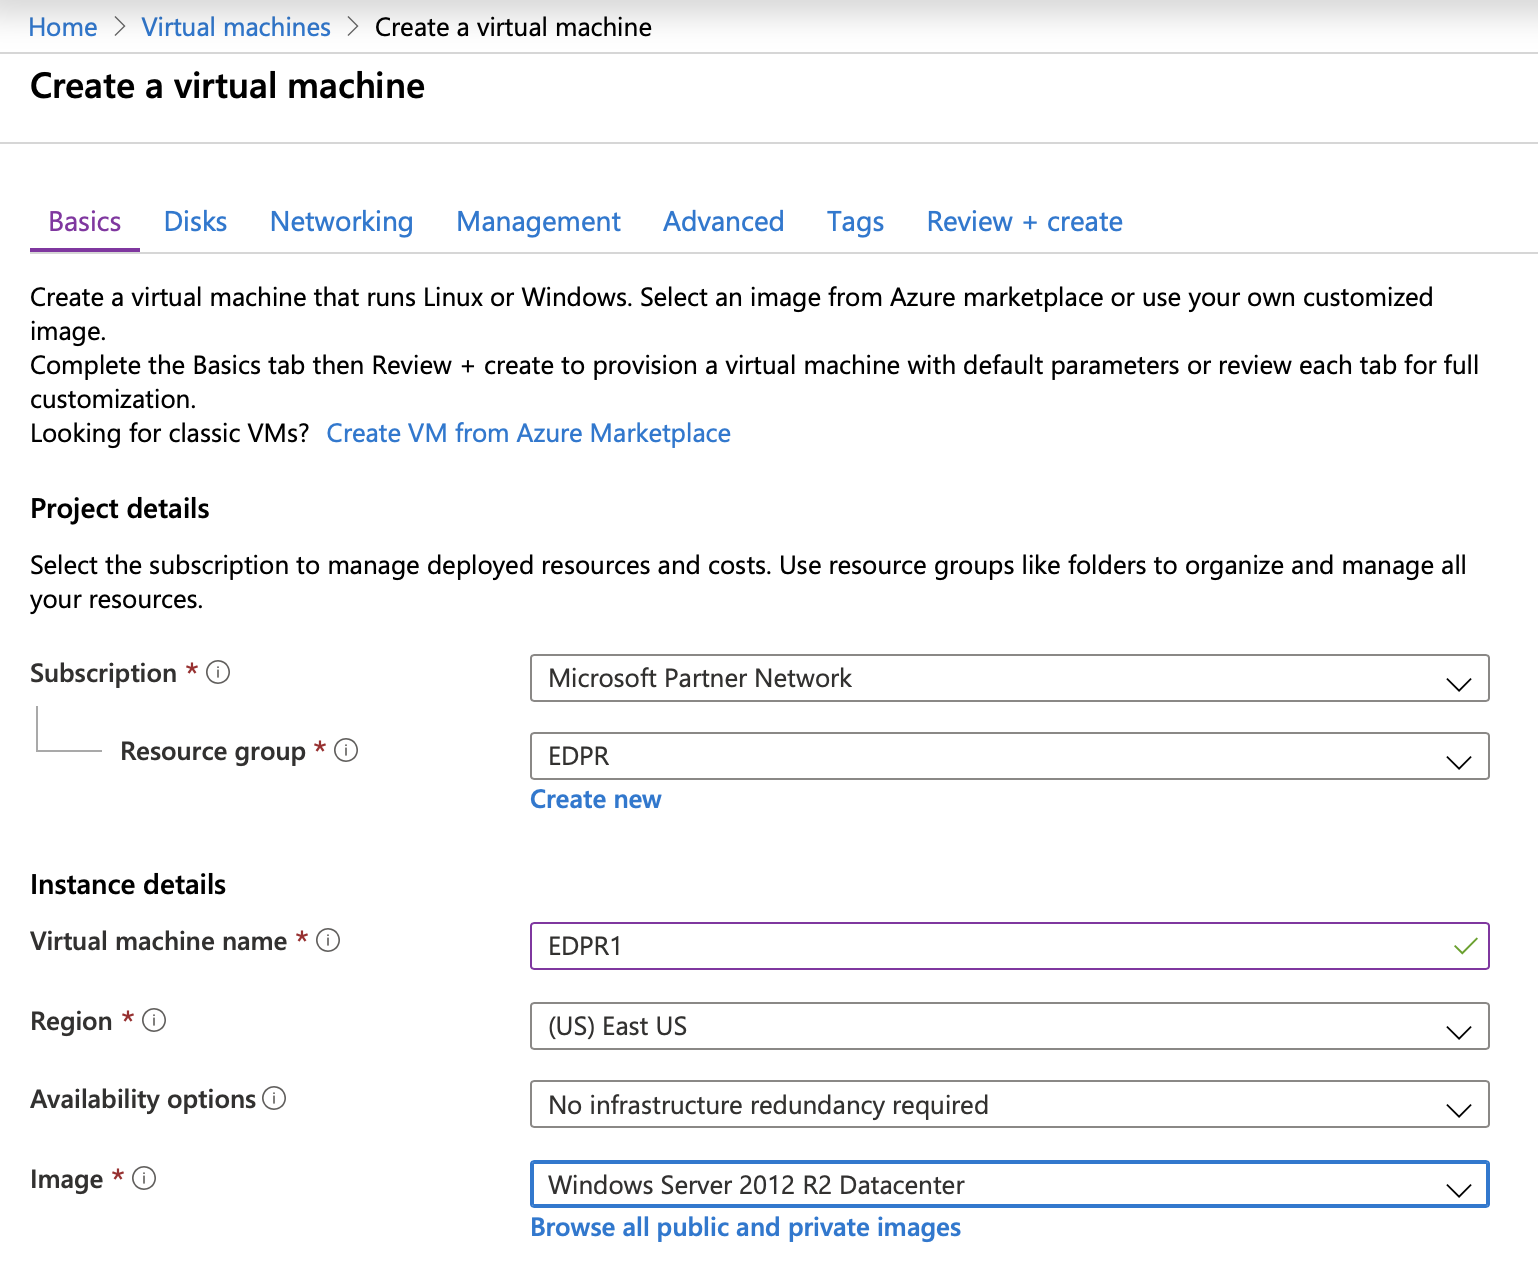
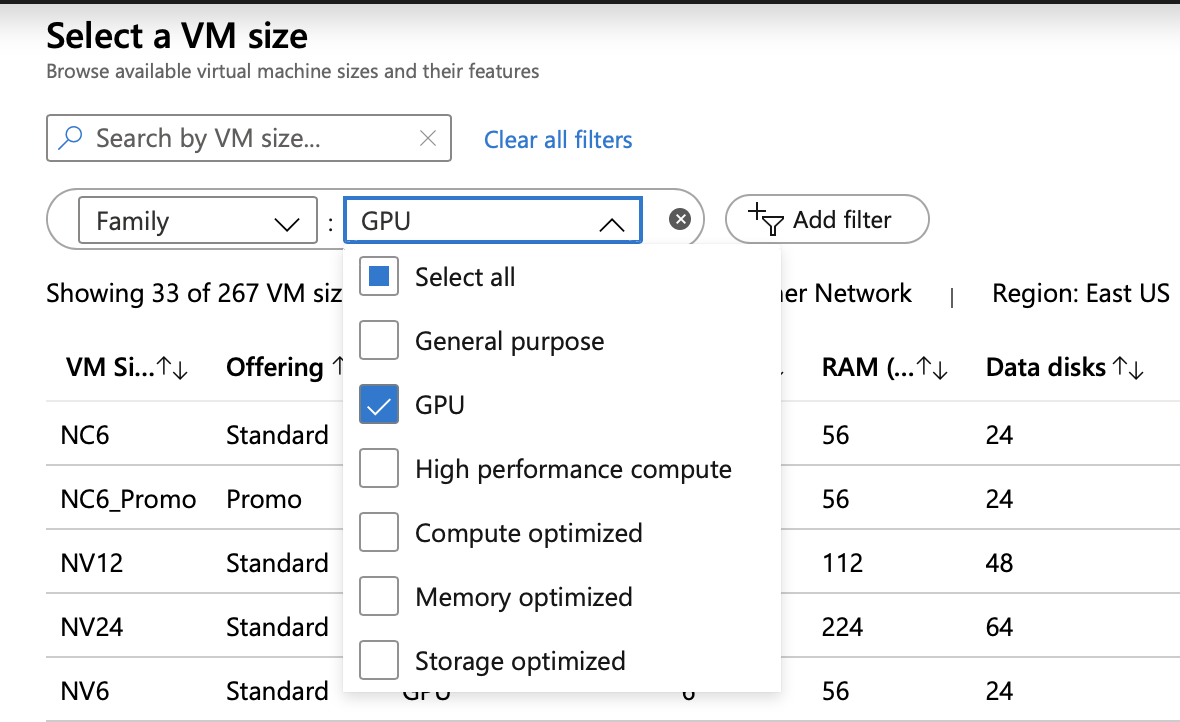
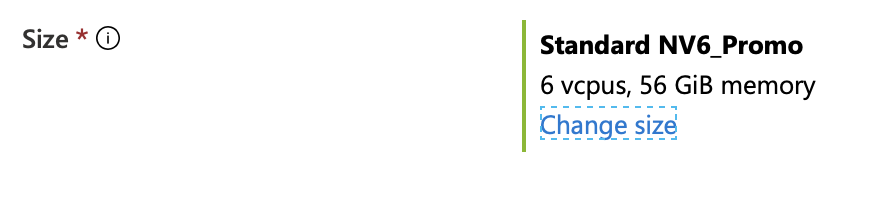
Your virtual machine should look like this:
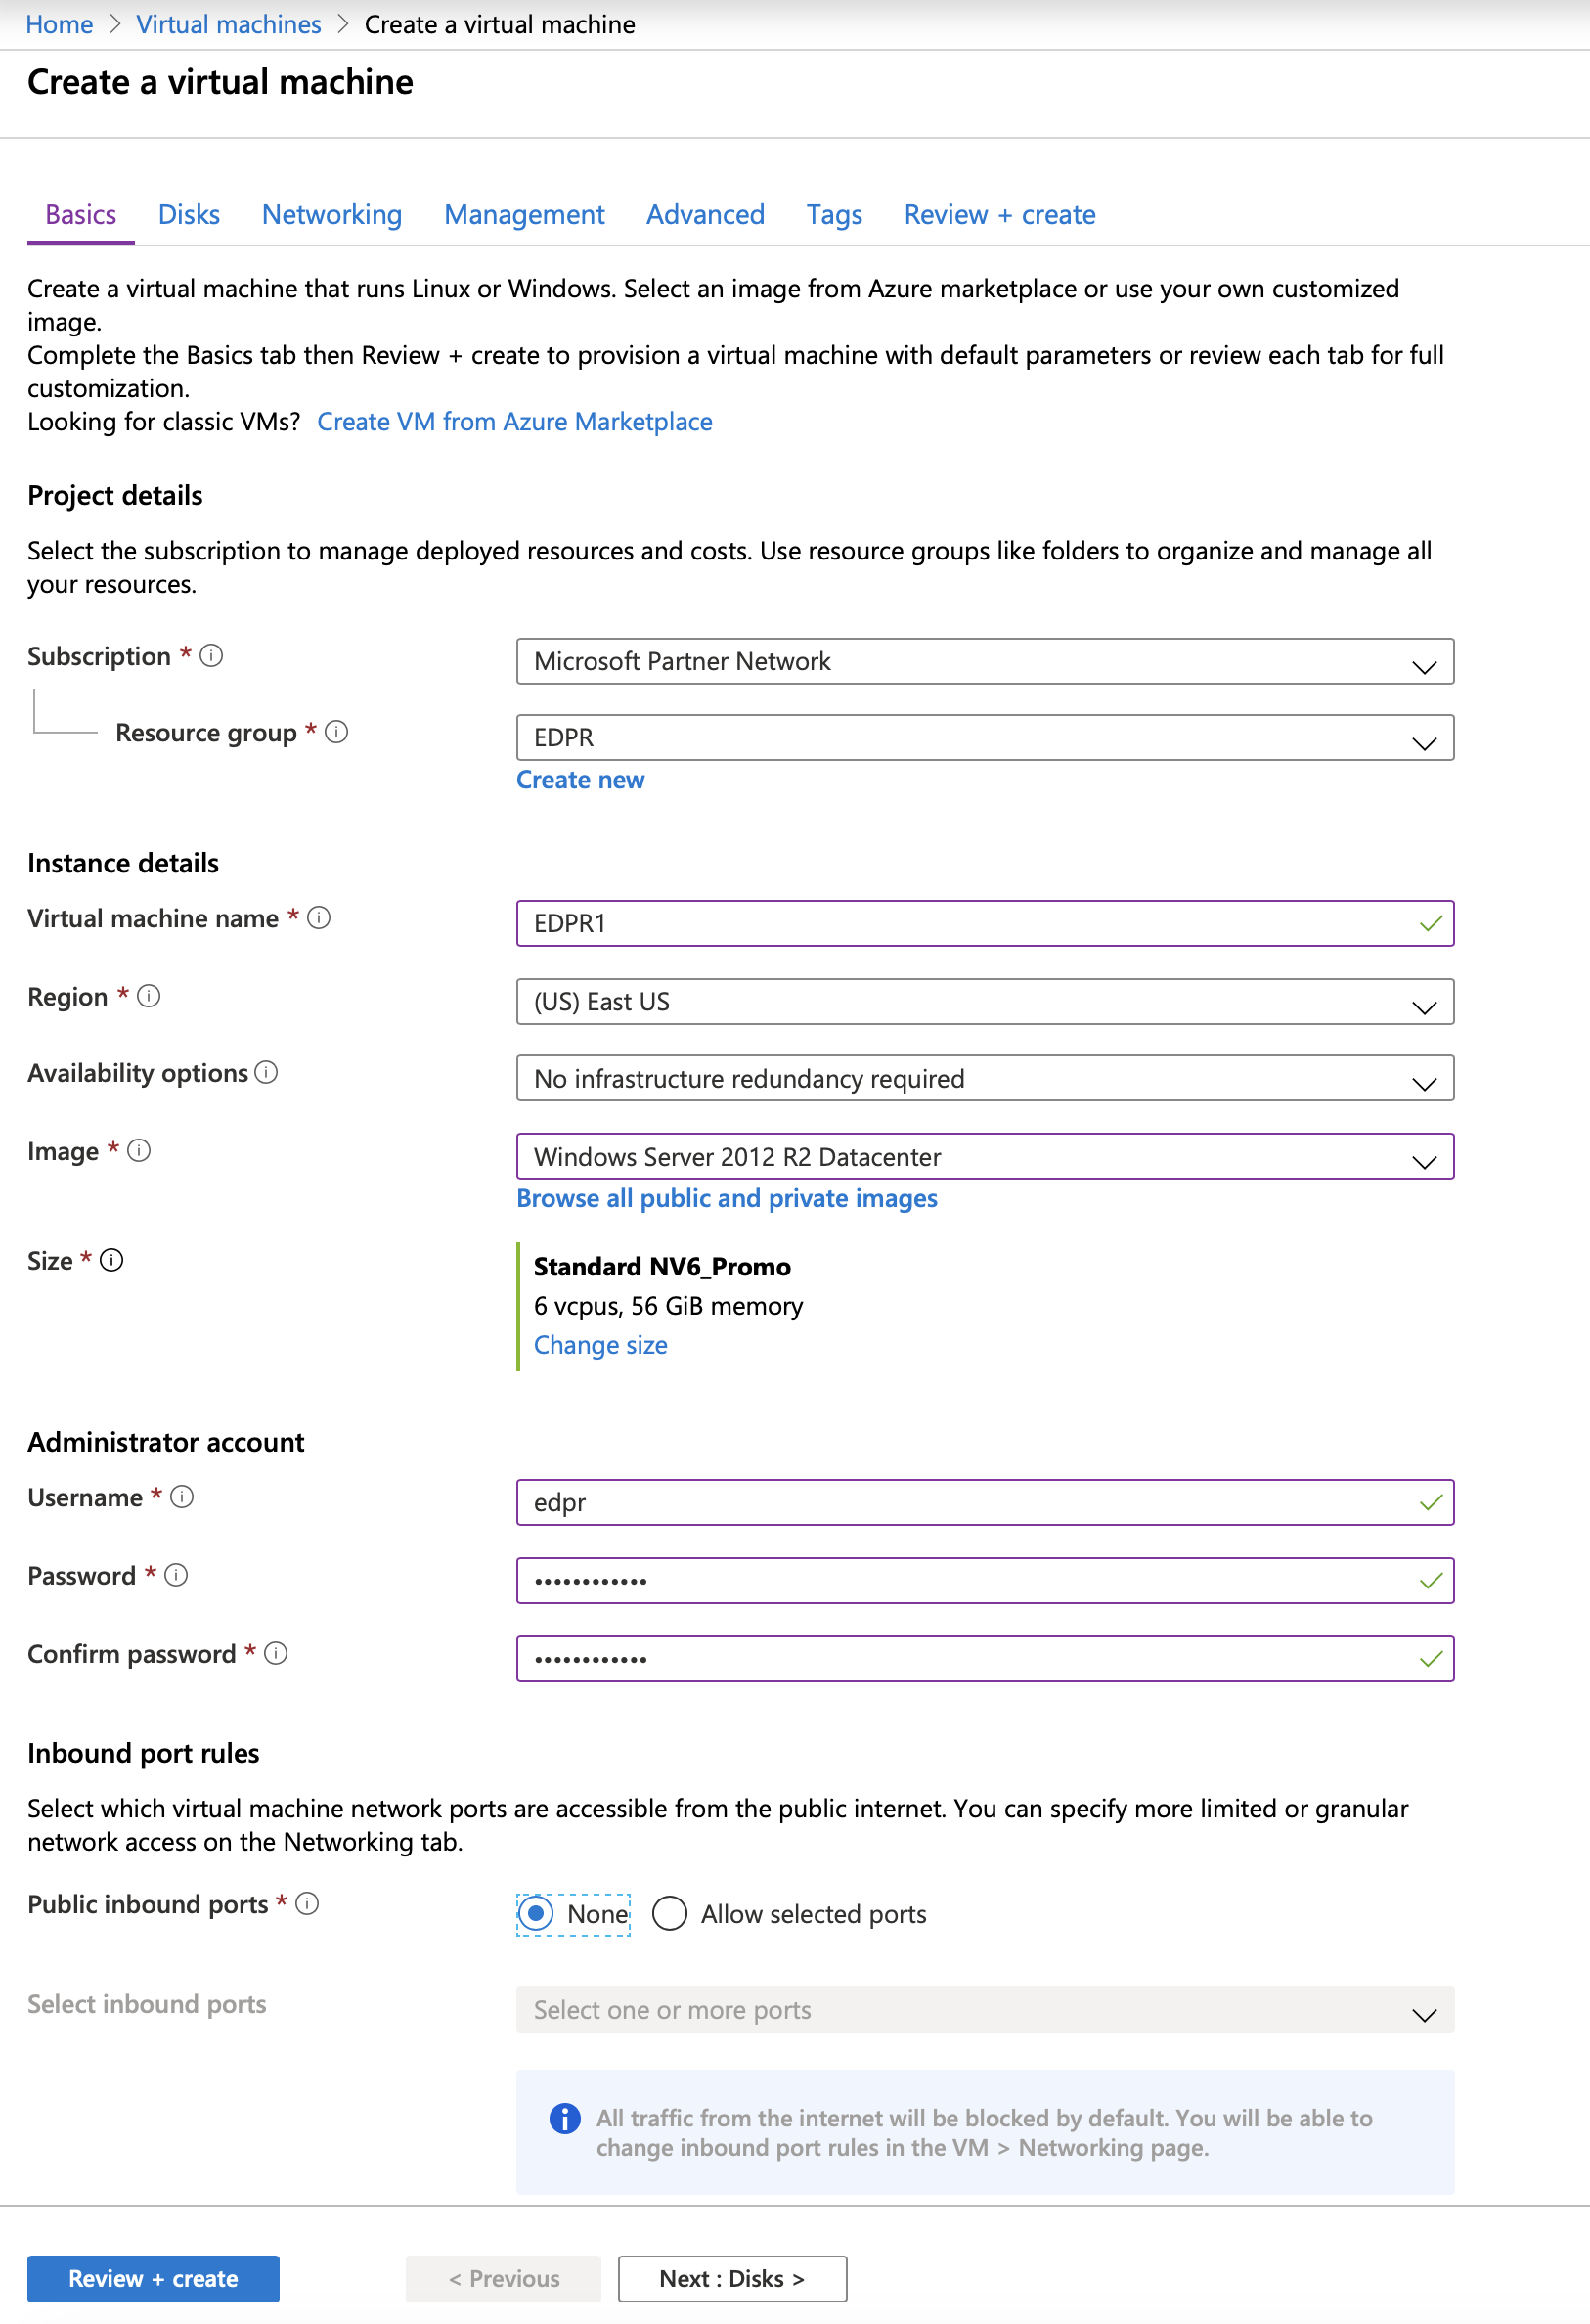
We recommend to select “Standard HDD” storage because storage type does not affect the performance of brute-force attacks. At the same time, HDD-based storage is considerably less expensive compared to SSD-based one.

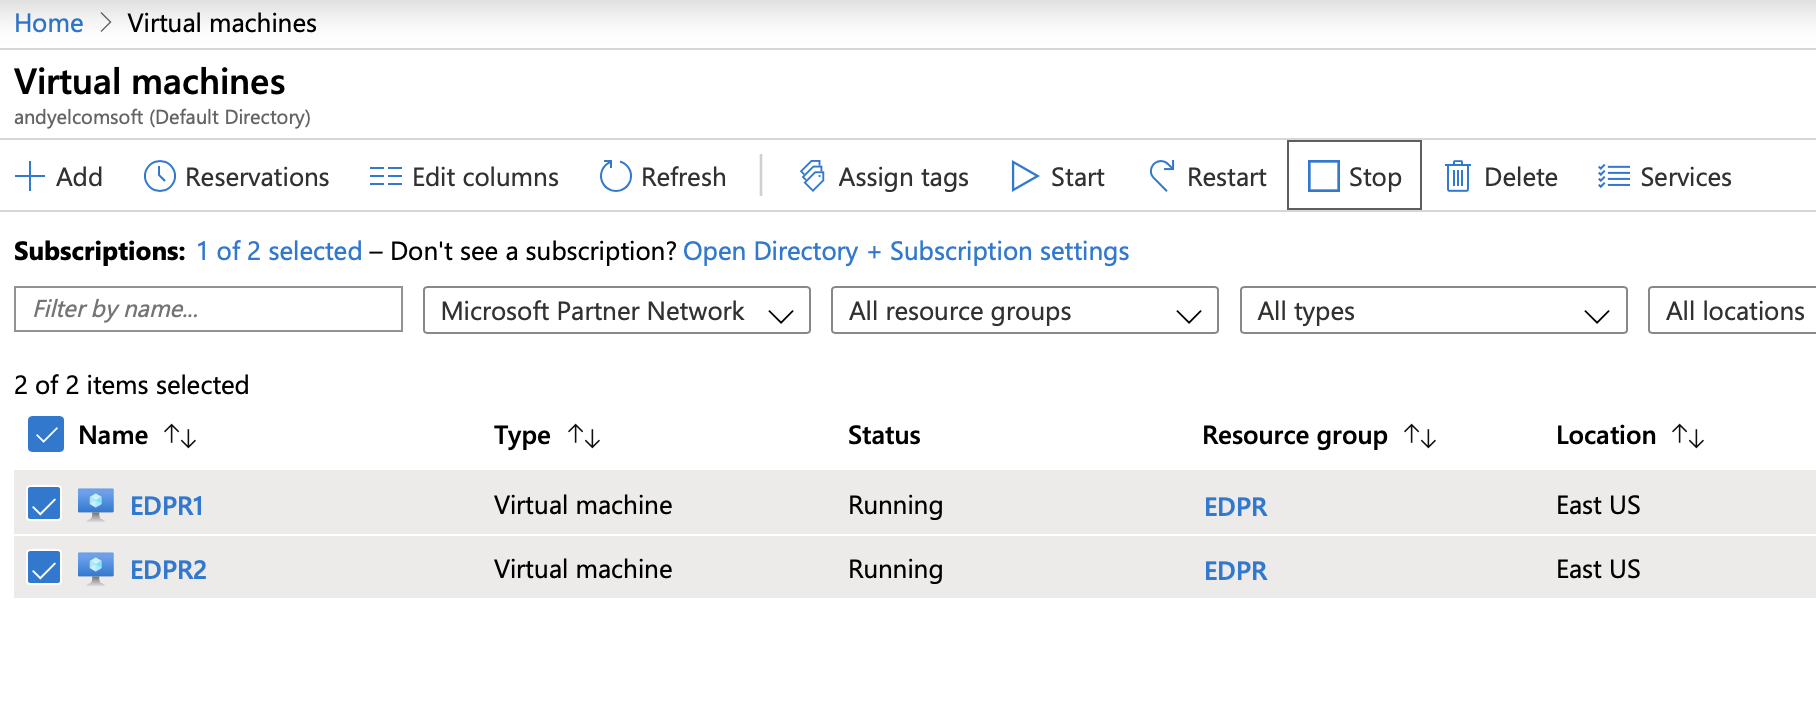
All virtual machines must be in the “Running” state before installing the agents:
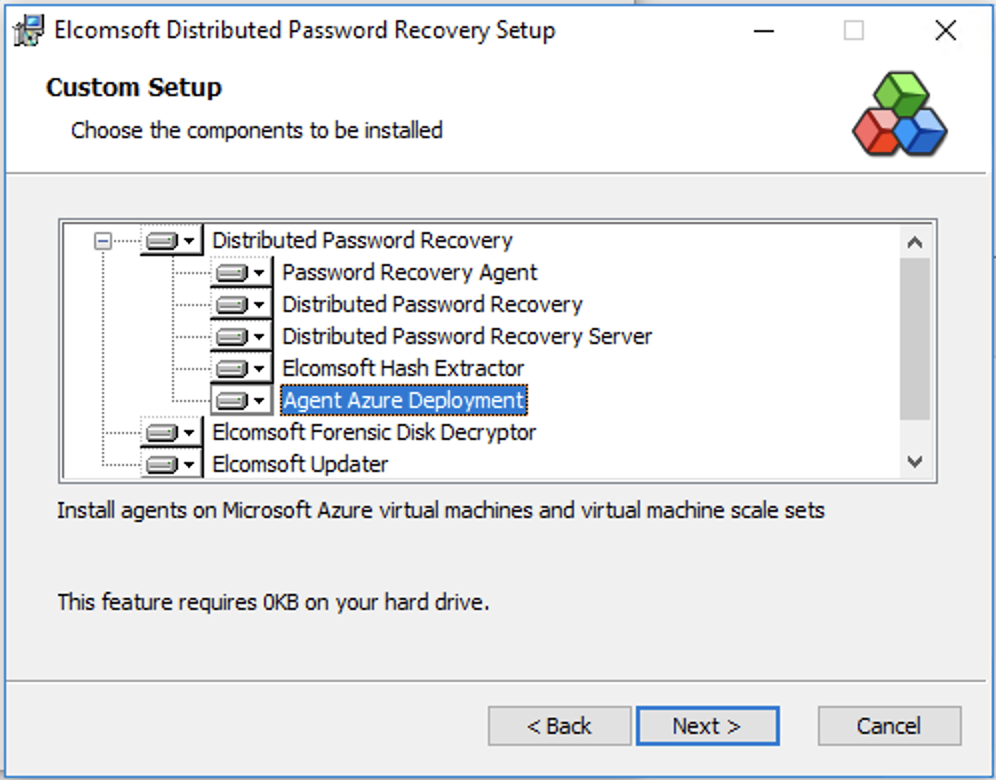
The next step is installing Elcomsoft Distributed Password Recovery with the “Agent Azure deployment” option:
Run EDPR Console (Distributed Password Recovery) and select “Azure -> Install agents on virtual machines” from the menu. Windows PowerShell will come up with Azure Sign In window:
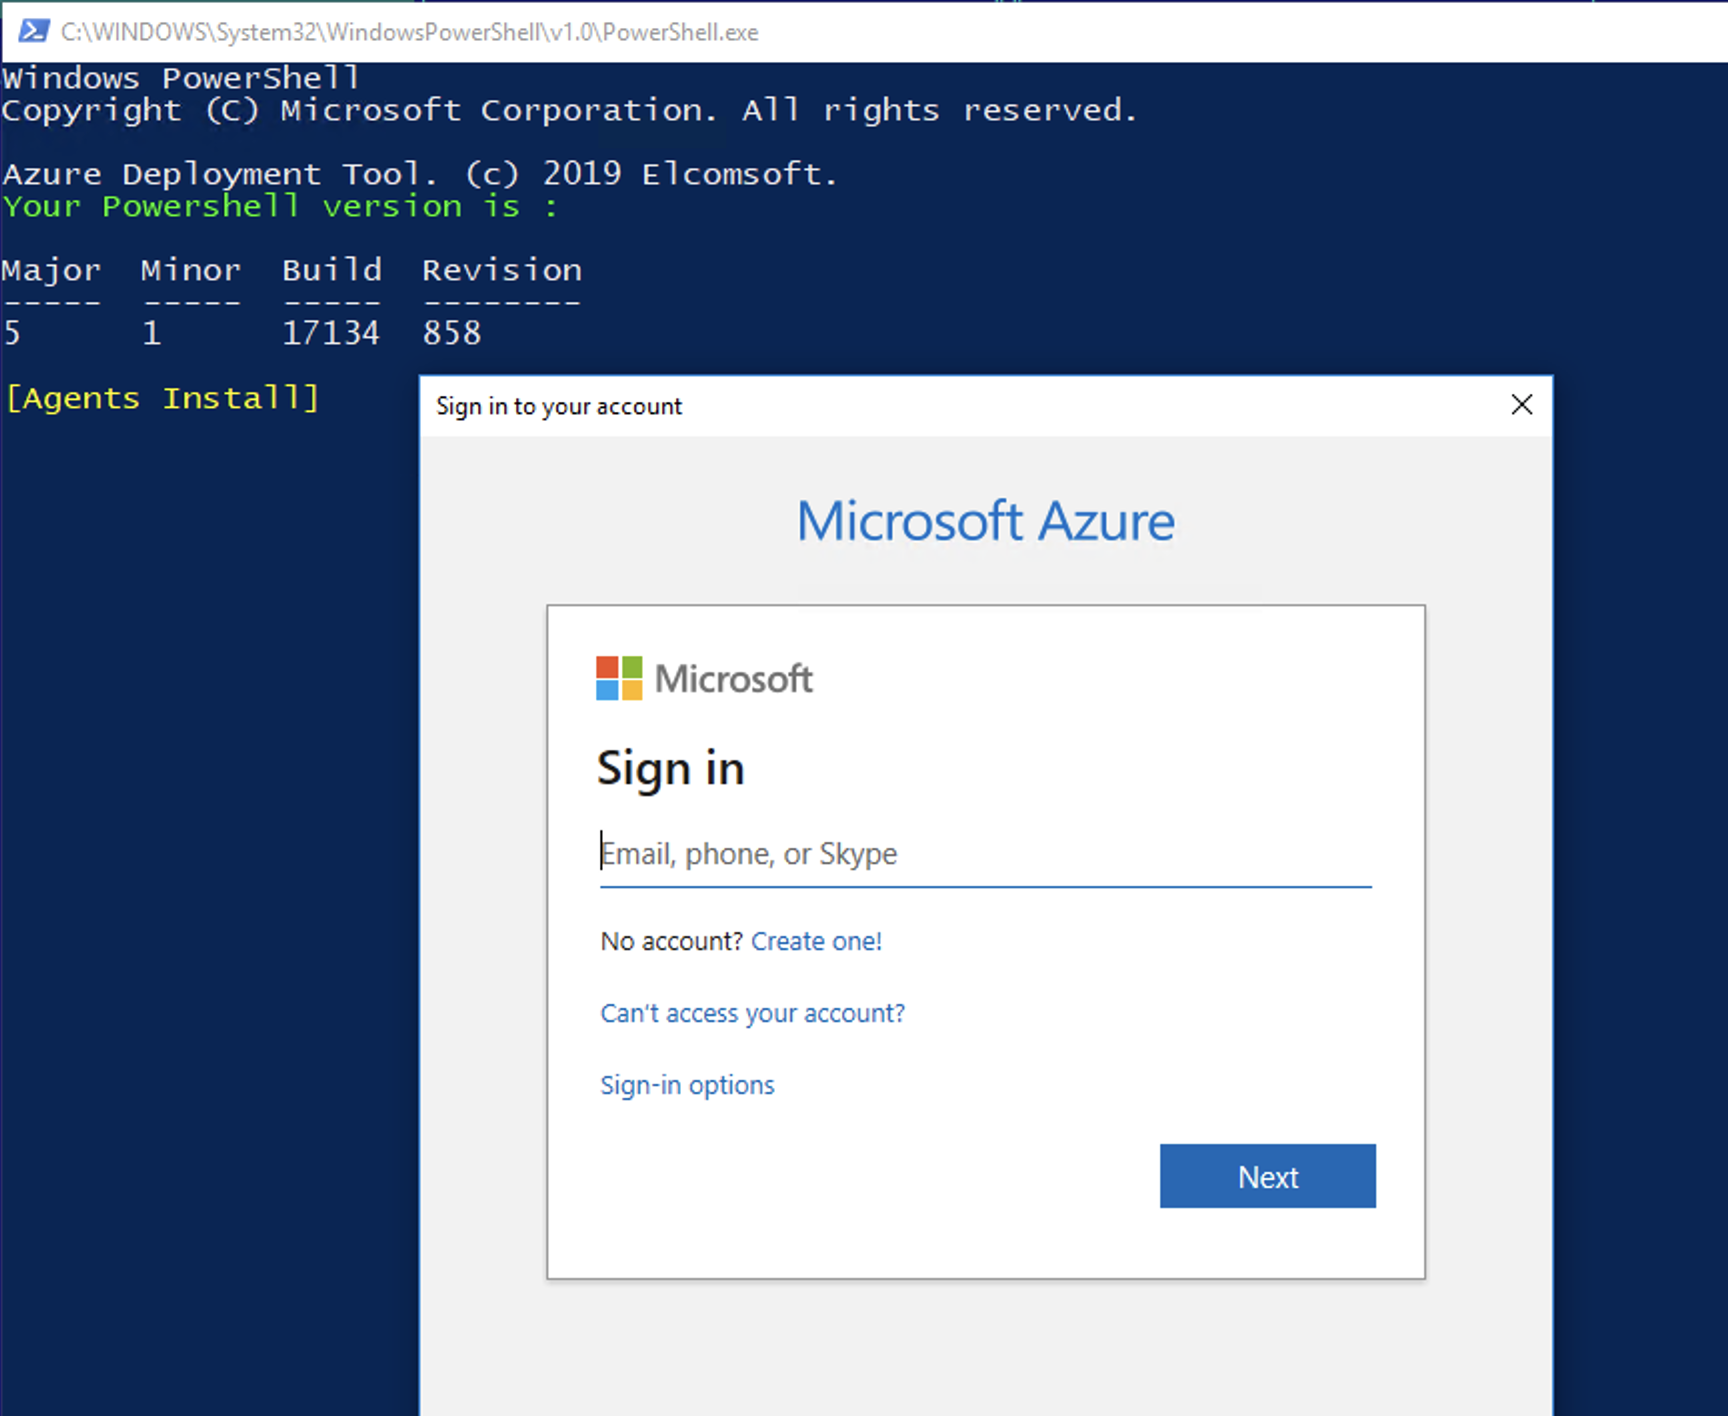
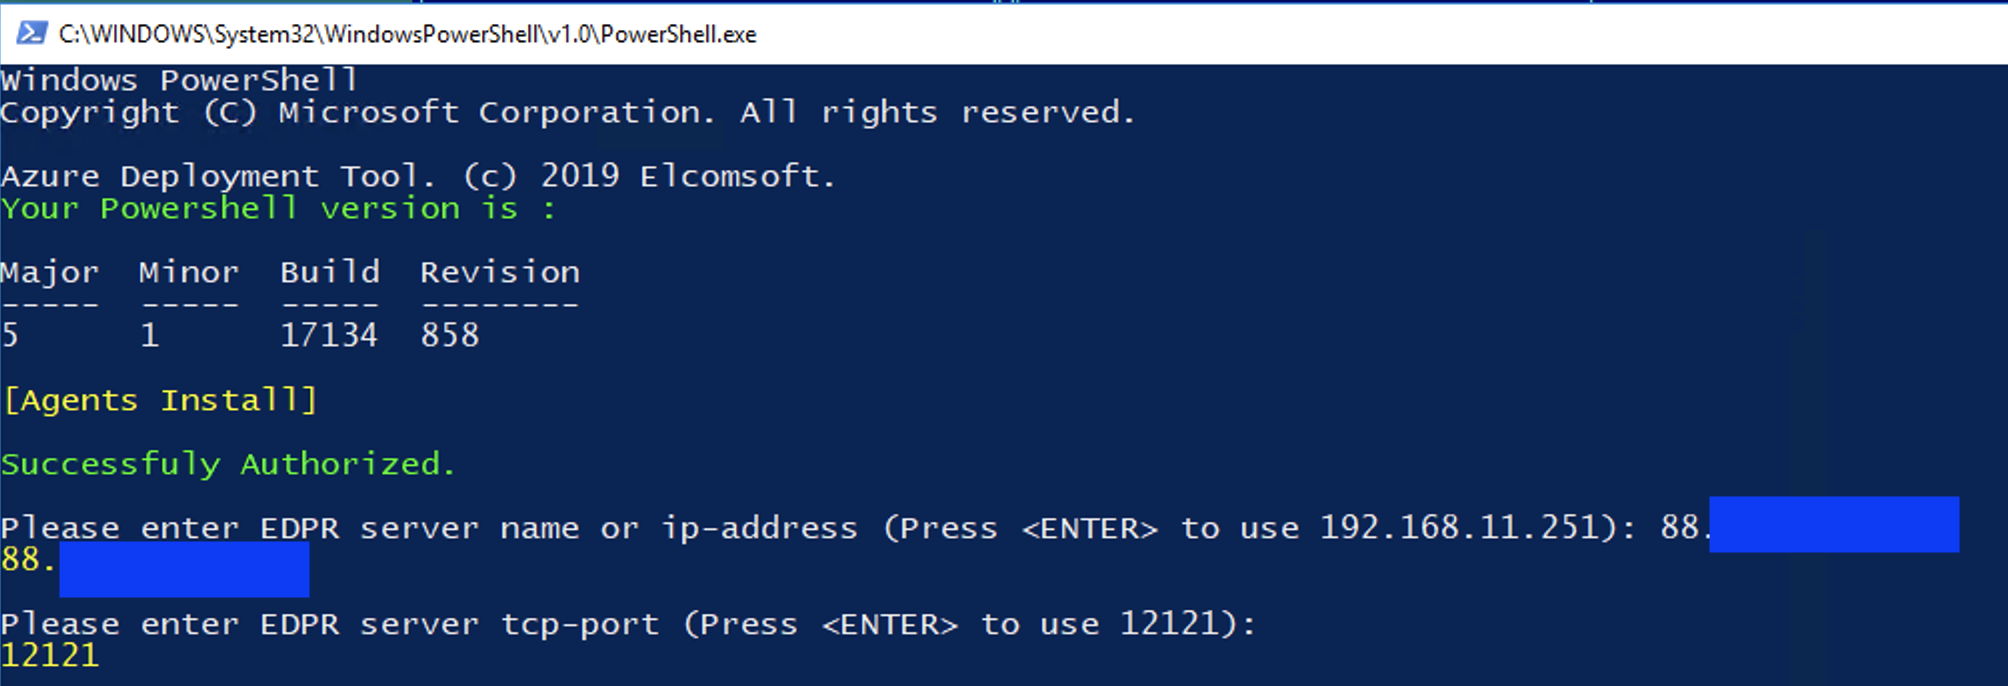
Enter your Azure login and password (if you have 2FA on your account, you will need to pass it). The next step is specifying the IP address and port number for your EDPR server. If you have a EDPR server on your computer, please ensure that the EDPR agent port (usually 12121) is properly mapped on your router. If you have your EDPR server in Microsoft Azure, you can enter the internal IP address of the virtual machine with installed server.
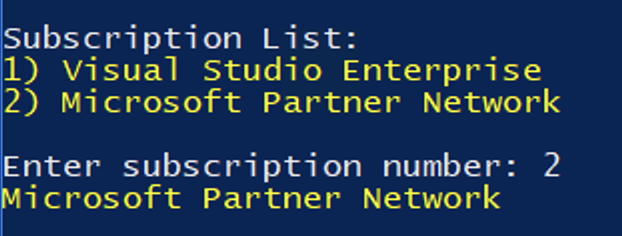
Select your Azure subscription (this dialog will not appear if you have only one subscription):
Select the resource group that contains your virtual machines:
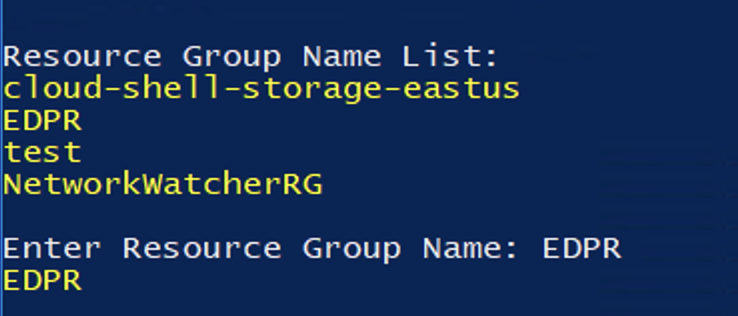
The script will show you all the virtual machines that you created in resource group. All machines must be in the “Running” state:

Press Enter, and the agent deployment process will start!
NVIDIA drivers will be installed on GPU accelerated machines:

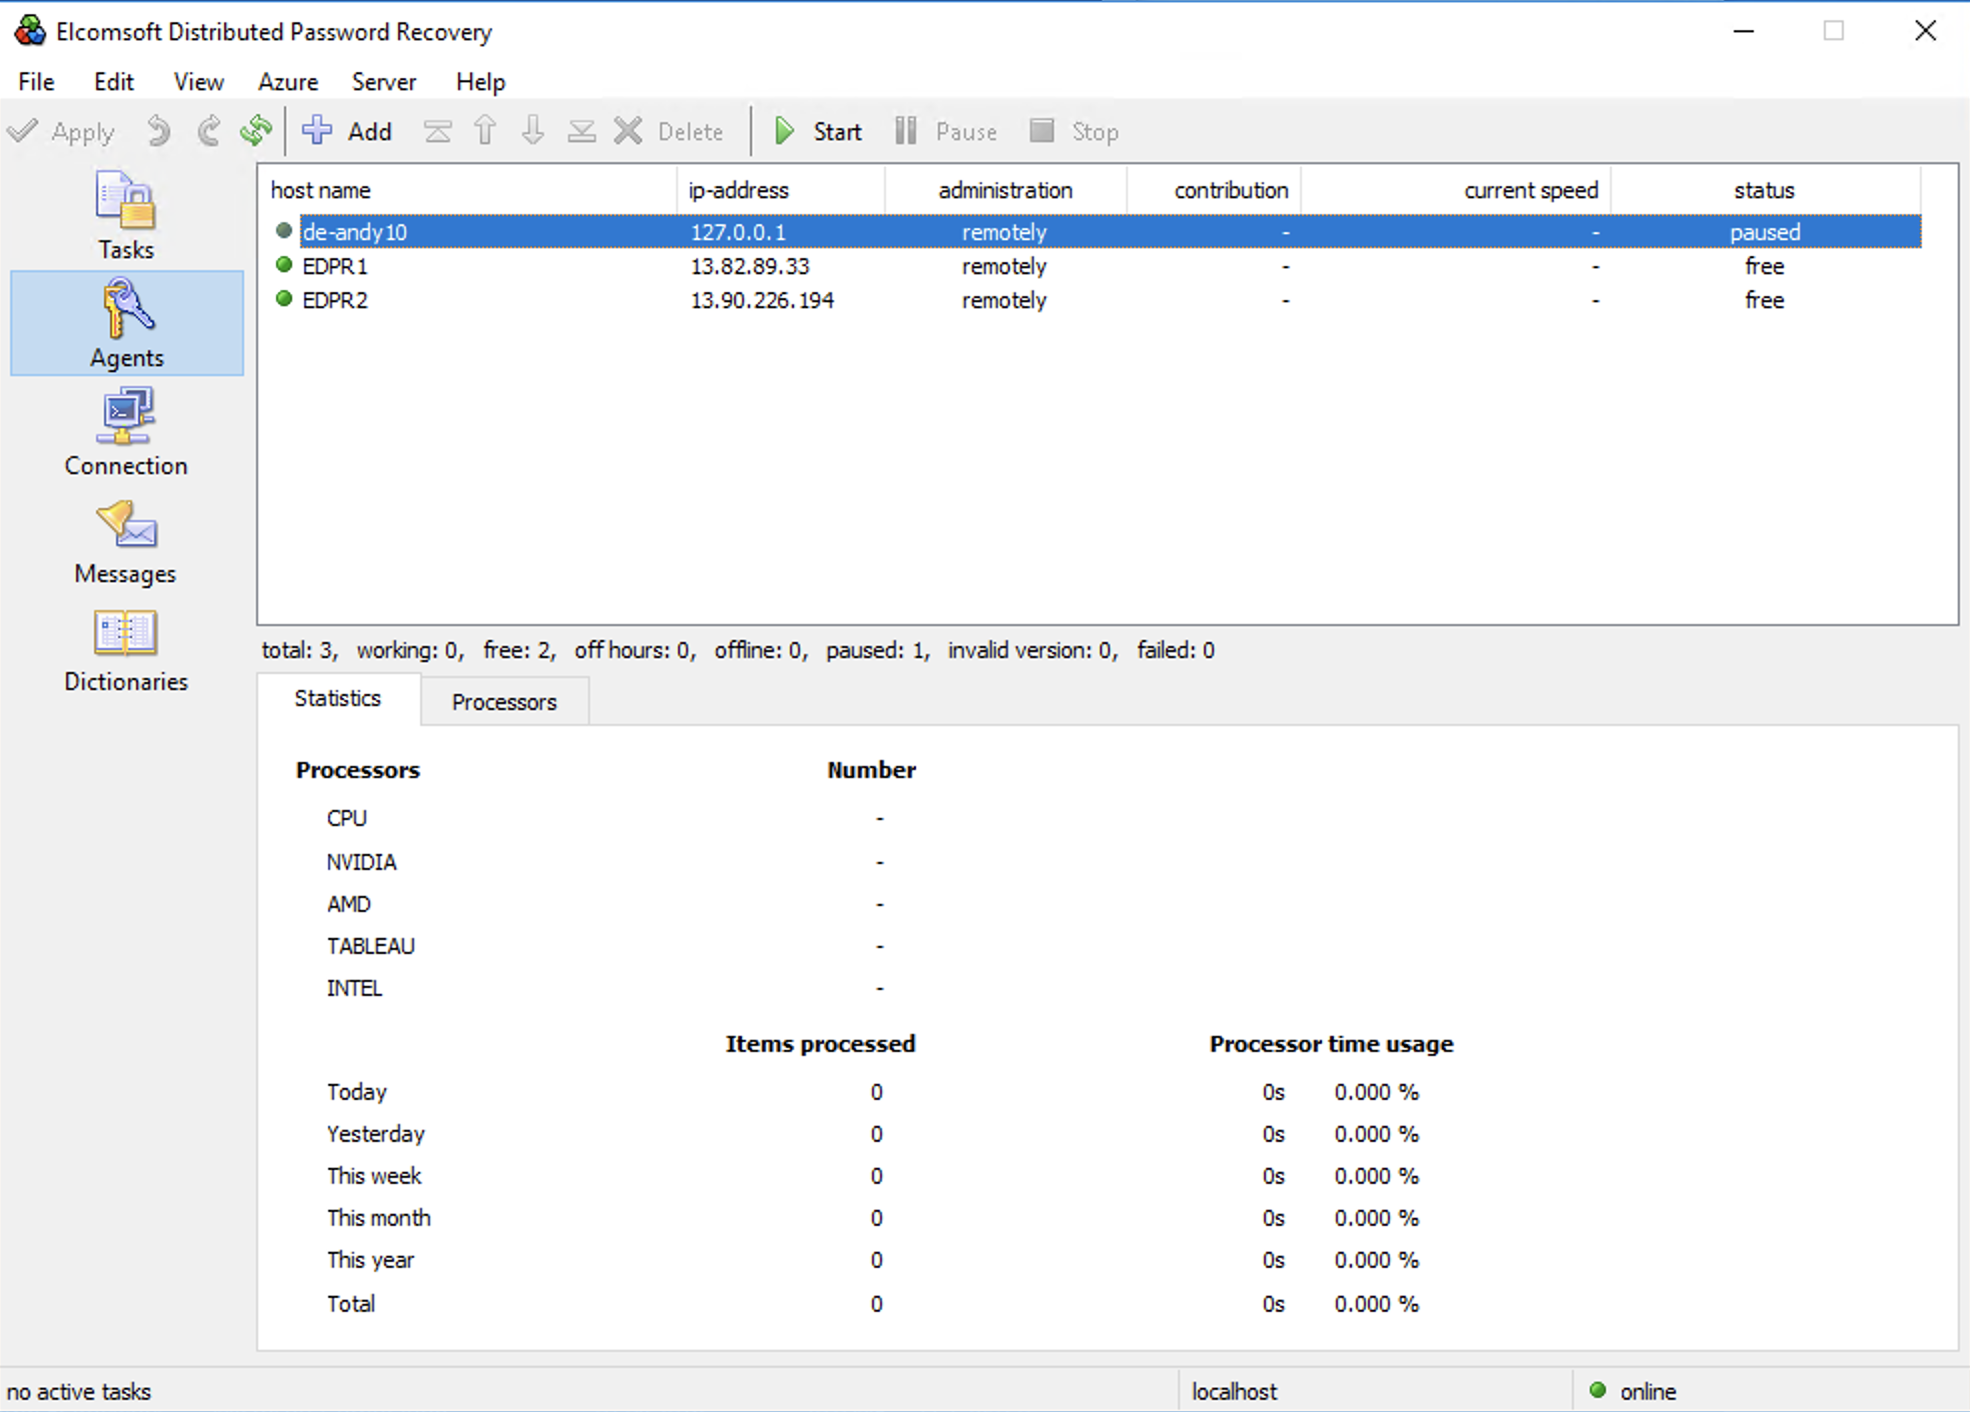
Please be patient. Installing the drivers and the agent may take some time (approximately 3-10 minutes for each machine). And finally you will see all the virtual machines in the EDPR console:
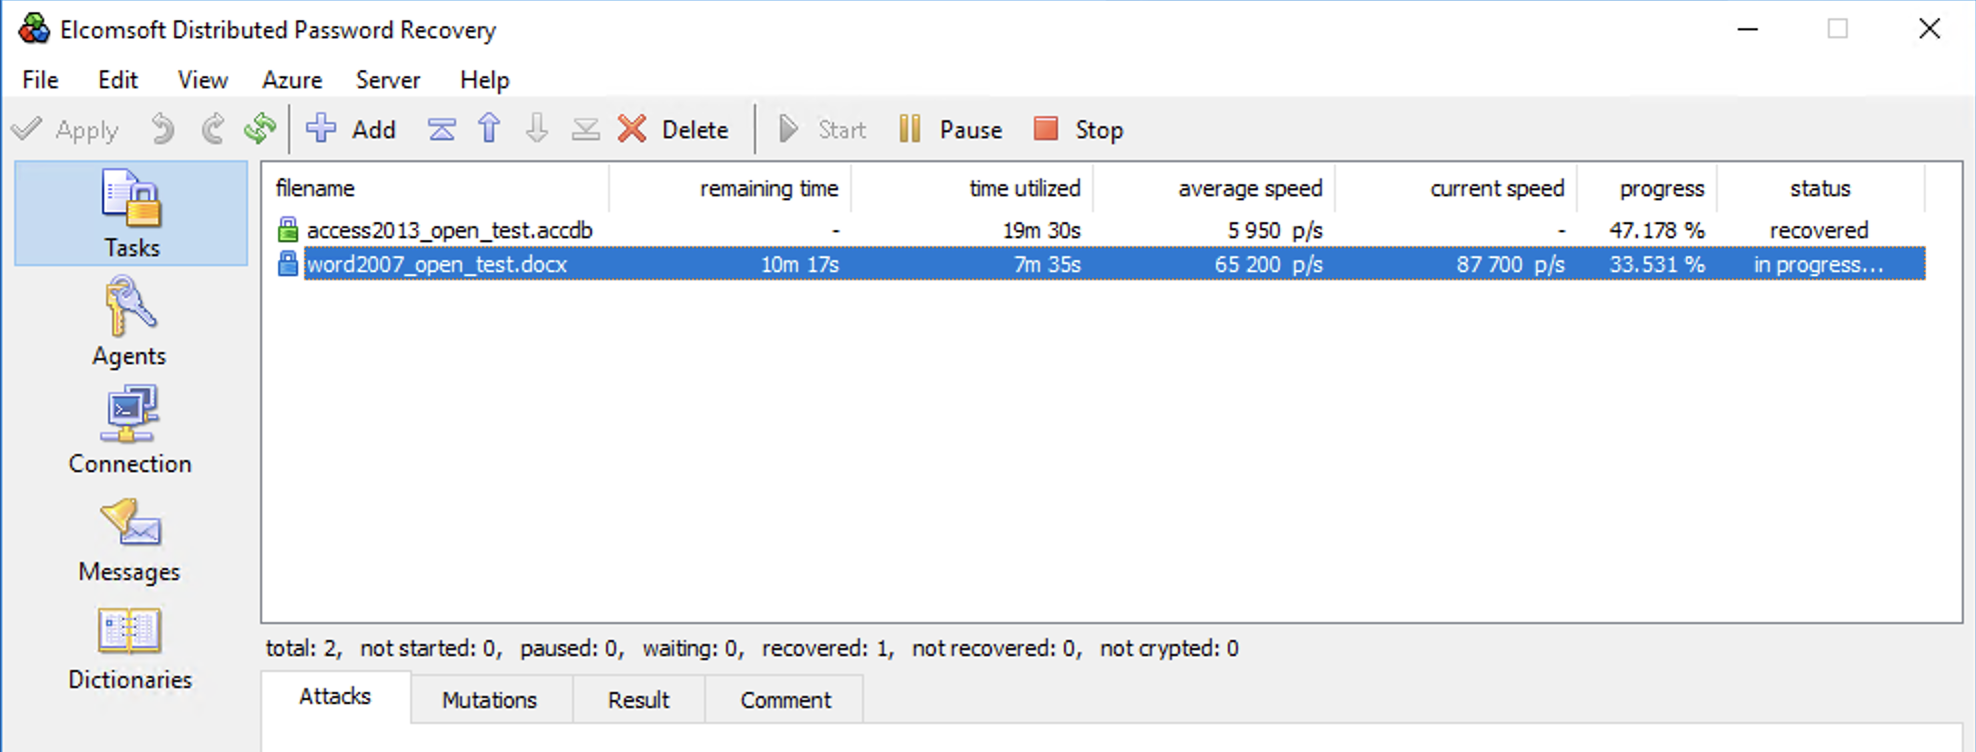
Run any password recovery task and enjoy Azure GPU acceleration!
The latest version of Elcomsoft Distributed Password Recovery can be downloaded here.
Okay that’s All folks, see you in the next post.