
Okay guys yaa… kita balik lagi di materi Svelte … kita akan membuat animations typing text ya… biasanya ini muncul di suatu landing page Portfolio seseorang… animasi ini sering digunakan …
CustomJS.svelte
<script>
let visible = false;
function typewriter(node, { speed = 1 }) {
const valid = (
node.childNodes.length === 1 &&
node.childNodes[0].nodeType === Node.TEXT_NODE
);
if (!valid) {
throw new Error(`This transition only works on elements with a single text node child`);
}
const text = node.textContent;
const duration = text.length / (speed * 0.01);
return {
duration,
tick: t => {
const i = ~~(text.length * t);
node.textContent = text.slice(0, i);
}
};
}
</script>
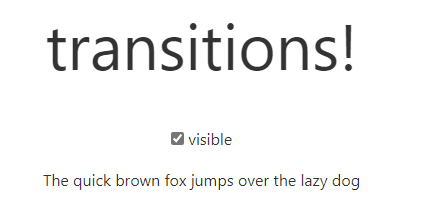
<label>
<input type="checkbox" bind:checked={visible}>
visible
</label>
{#if visible}
<p transition:typewriter>
The quick brown fox jumps over the lazy dog
</p>
{/if}
dan import pada App.svelte
<main>
	<h1>Hello {name}!</h1>
	<p>Visit the <a href="https://svelte.dev/tutorial">Svelte tutorial</a> to learn how to build Svelte apps.</p>
	<Counter />
	<Toggle />
	<Img />
	<String />
	<Statement />
	<Condition />
	<Nested answer={42}/>
	<Nested/>
	<Info {...pkg}/>
	<IfLogin />
	<Comparison />
	<EachYoutube />
	<KeyEachThing />
	<GenerateNumber />
	<MouseMove />
	<MouseMoveInlineHandler />
	<EventModifier />
	<AlertCompEvent />
	<AlertEventForwarding />
	<CustomButtonComp />
	<TextInput />
	<NumericInput />
	<CheckboxInputs />
	<GroupInputs />
	<TextareaInputs />
	<FileInput />
	<SelectBindings />
	<SelectMultiple />
	<EachBlockBindings />
	<MediaElements />
	<Dimensions />
	<BindThisCanvas />
	<ComponentBindings />
	<OnMount />
	<OnDestroyIntervals />
	<BeforeAndAfterUpdate />
	<Tick />
	<h1>The count is {countValue}</h1>
	<Incrementer/>
	<Decrementer/>
	<Resetter/>
	<h1>The count is {$countAutoSubscriptions}</h1>
	<IncrementerAutoSubscriptions/>
	<DecrementerAutoSubscriptions/>
	<ResetterAutoSubscriptions/>
	<h1>The time is {formatter.format($time)}</h1>
	<h1>The time is {formatter.format($time)}</h1>
	<p>
		This page has been open for
		{$elapsed} {$elapsed === 1 ? 'second' : 'seconds'}
	</p>
	<h1>The count is {$countCustom}</h1>
	<button on:click={countCustom.increment}>+</button>
	<button on:click={countCustom.decrement}>-</button>
	<button on:click={countCustom.reset}>reset</button>
	<Tweened />
	<Spring />
	<TransitionsDirective />
	<AddingParameters />
	<InOut />
	<CustomCss />
	<CustomJs />

</main>
dan hasilnya akan seperti ini …
Okay sudah berhasil ya… berikut link githubnya ada disini …. cyaaa…